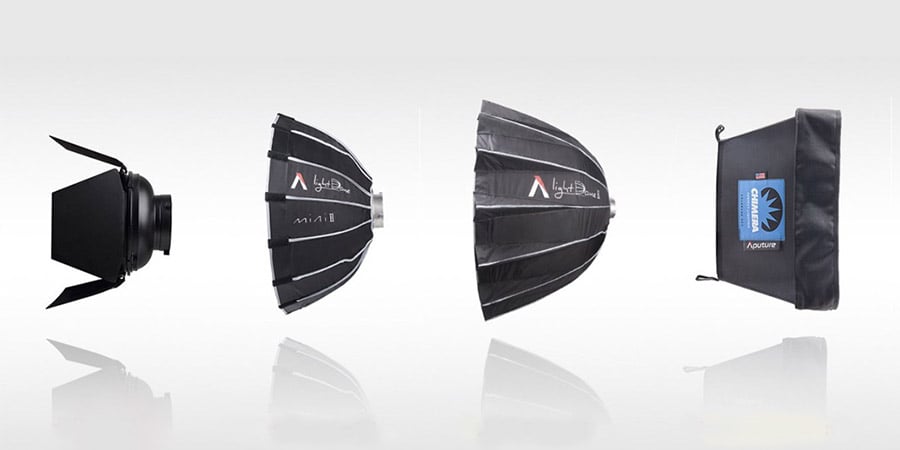
Lighting modifiers are essential tools for product photography. They help to create the perfect lighting conditions for any product shot, allowing photographers to achieve the desired look and feel.
Strip boxes, scrims, snoots, barn doors, and color gels are all common light modifiers used in product photography. These tools allow photographers to control the direction, intensity, and color of the light hitting their subject.
By using these tools in combination with other lighting techniques such as reflectors and diffusers, photographers can create stunning images that capture their products in the best possible light.
Having a good quality camera and the right lenses matter a great deal when it comes to product photography. However, there is something that matters even more. Knowing how to work with light is one of the most important skills that any photographer can have.
Lighting modifiers for product photography will help you to produce better and higher quality photographs. A better quality photograph means less time in post-production. Many product photographers spend an excessive amount of time on their photos after the photographic process has been completed. More often than not, it is because they don’t understand how to work with light.
Lighting Modifiers for Product Photography
When you are new to photography, it is important to learn about the tools that you need to create a high quality photograph. Lighting modifiers are essential when it comes to working in a studio.
Should you just go out there and invest in a bunch of light modifiers? Before you spend a pile of cash on anything in the photography industry, you need to do your research. As soon as you start talking about professional photography equipment, the numbers start to add up. Yes, buying professional equipment for product photography is expensive.
What Is The Function of a Light Modifier?
To take a great photo, you often need to improve the light. Light modifiers is the collective name for the equipment used by professional photographers when they take photos of particular subjects. In this case, we are going to take a look at light modifiers for product photography.
Light modifiers help the photographer to improve the light in a studio setting or outside environment. A range of light modifiers is used to achieve a certain mode. Used in the right way, modifiers will help to highlight part of a photograph or draw attention to something in the image. For instance, many product photographers draw attention to a brand or product name.
Why Is a Light Modifier Needed?

When you want to replicate a certain light in a studio setting, learning to work with light modifiers is one of the solutions.
Light modifiers used in the right way help you to control hard and soft lights. If you want to flatter the quality of a product, you need to learn how the quality of the light affects your final image. Getting the light right at this stage will save you a lot of time and effort.
You are probably wondering how you get the relevant experience. Sure, you can take a course or work in a photographic studio for a while. Ultimately though, it is about experimenting with light yourself. That is what all great artists do.
As a product photographer, you are going to have to photograph a huge range of different products to make your business a success. Each product will require a different approach. That is why you should never be afraid to experiment with light.
What Are The Essential Light Modifiers In Product Photography?
Yes, there are light modifiers that work better in product photography than others. Here are a few hot tips:
- Softboxes
- Strip boxes
- Reflector with grid
- Diffuser
- Umbrella
- Scrims
- Snoot
- Reflector
- Grid
- Color gels
- Gobos
What Is A Scrim?
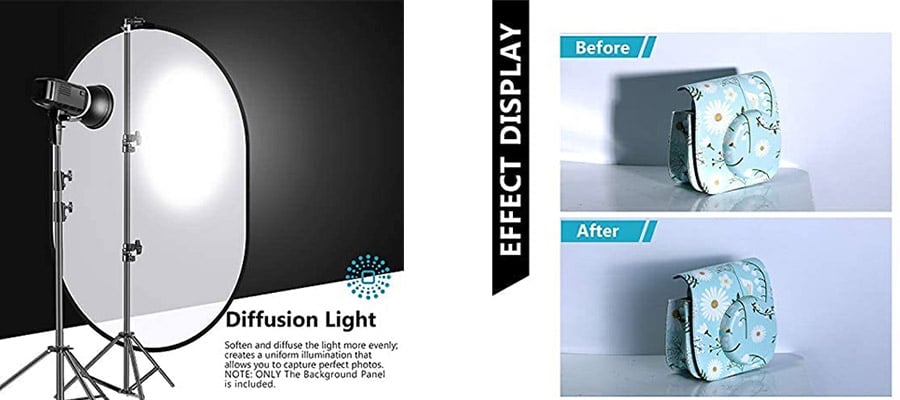
One of the best ways to modify light in any setting is using scrims. Compared to other ways of modifying light, they are uncomplicated to use and relatively inexpensive. As a matter of fact, you can make your own scrim.
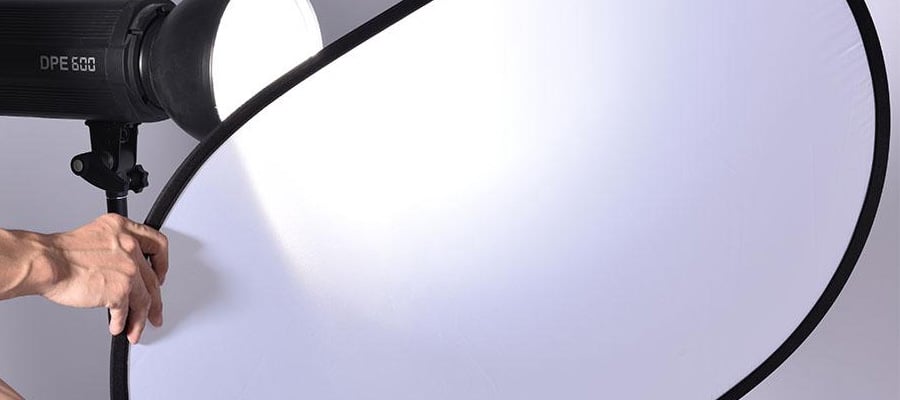
What is a scrim? It is a material placed in between your light source and subject matter. A scrim helps to reduce or diffuse light. Scrims are available in a range of sizes and shapes. It all depends on how you are going to use your scrim. Photographers with industry experience often make their own.
Scrims are not always solid. Many who are new to photography don’t realize that scrims don’t necessarily have a solid frame. For instance, open-ended scrims help to feather the light. When you use an open-ended scrim, you avoid the harsh falloff effect of light.
A scrim is used to transform light. If you want to block light entirely in a natural setting, you will need to use what is known as a flag. But, flags are seldom used in product photography.
Decreasing Light on a Product Shoot
Decreasing light is useful under certain conditions in a studio environment. Too much light can easily fail to have the desired effect. You will either pick up reflections or fade the product out. In other words, when the light is too intense, the edges of the product will blur.
Learning to work with scrims can have some amazing results. They are one of the most useful lighting modifiers for product photography.
Find out how you can make your own scrim for your product photography studio here.
Diffusing Light with A Screen
One of the best ways to enhance the look of a product is to diffuse light. Diffusing light helps to create natural shadows and slight light nuances.
When you want to diffuse light using a scrim, you need to make one out of woven fabric. Once you have started to make fabric screens, you will notice that different fabrics have unique properties. Silk will create a very soft almost opaque light that is hard to replicate in any other way.
Where Do You Start with Scrims?
You can buy already made-up scrim and flag kits. When you are just getting into product photography, investing in special kits for product photography is a great idea.
If you would like more information about product photography kits, we have put together an article on the subject.
Do all product photographers work with scrims? No, not all do. In fact, working with scrims is less common in this particular genre of the photographic business. However, that does not mean that you shouldn’t. As always, it is a learning curve. You need to find out what works for you. Scrims are a budget-friendly way of creating the light and making your own light modifiers.
The Cons Of Softboxes

A major downside of softboxes is the cost of buying them. Okay, they are not the most expensive piece of kit that you will buy. But, if you are starting out, good quality softboxes can eat up a substantial part of your budget.
A good alternative to softboxes is speedlites. When you have been working as a product photographer for a while, you can always upgrade your light boxes. At the same time, looking out for second hand photography equipment is a great idea.
How To Use Softboxes As Lighting Modifiers For Product Photography
With so many lightboxes available, you would have thought that almost all photographers would understand how to use them. Unfortunately, even experienced photographers don’t use them correctly. The most common mistake is to use them too far away.
How To Make The Most Out Of Using Softboxes
Your Distance From The Product
The distance you place your light source will influence the hardness and softness of the light. In addition, the distance to the light will have an impact on the surface of the product. The distance to the light source plays a huge role when the product you are photographing is made from metal or glass.
If you are photographing eyewear, you need to pay particular attention where you place your softbox. Eyewear picks up light reflections more than any other subject.
Play around with the distance and you will soon notice how the subject absorbs the light. When we photograph with the light placed further away, a higher intensity is needed to achieve the best exposure.
The Size Of Your Softbox
Does the size of your softbox matter? The answer to that question is yes and no.
What you really need to consider is the size from the subject’s perspective. That has an impact on the hardness or softness of the light. By moving the box, you can control the appearance of the light
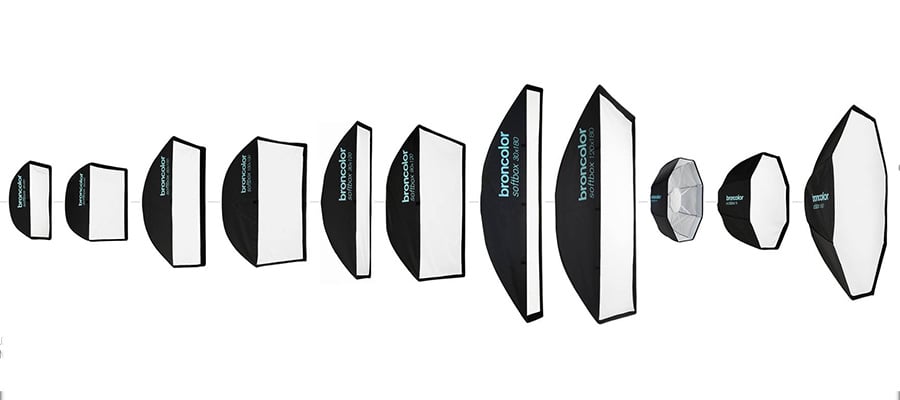
Does The Shape Of The Softbox Matter?
Not only will the shape of your softbox have an impact on the way the light wraps around your subject. Furthermore, it will also affect the way things catch the light and reflections.
Once again, understanding your subject is essential. For instance, in a beverage shoot your subject is likely to be highly reflective and using what is known as an octagonal box is not the thing to do. Instead you should use a thin strip box.
Does The Height Of Your Softbox Matter?
Most often than not, you will work with your softbox placed above the subject. That being said, there is no reason why you should not work with them placed below. You can get some really great results of luxury items such as handbags when you place a softbox below. When you photograph a quality item such as a designer handbag, it is imperative that you bring out its texture and form. The consumer will already know that the brand is associated with high quality materials, but you want to make sure that you emphasize it.
How To Choose The Best Softbox
What softbox is right for me? That is the most common question photographers are asked.
When it comes to answering that question, there are three things that you want to take into consideration. They include what you are photographing, the size of your studio, and your budget.
There is absolutely no point in going and buying a softbox that is not suitable for the products that you are shooting right now. Ideally, a softbox should be as versatile as possible.
If your budget allows it, buying the biggest softbox that you can afford is the best idea. A large softbox will give you extra versatility and flexibility.
Don’t forget about the accessories that come with your softbox. Don’t lose sight of the fact that filters and diffusers will help you when you work with a softbox in your studio.
What Are The Alternatives To Softboxes?
If a softbox is too much for your budget, there are alternatives. For instance, you can go ahead and buy an umbrella instead. Umbrellas are great light modifiers and cost-effective when compared to soft boxes.
Umbrellas are available in a variety of sizes. Many photographers prefer working with them instead of softboxes as they provide what is known as round catchlight.
The downside of umbrellas is that they don’t come with the same control as softboxes. Umbrellas spread the light much more. That is something that can affect the appearance of the product that you are shooting.
Umbrellas are harder to modify but the choice to use an umbrella is a valid one. If you are thinking about buying an umbrella, it is a good idea to see it in action before you buy one.
What Are Beauty Dishes?
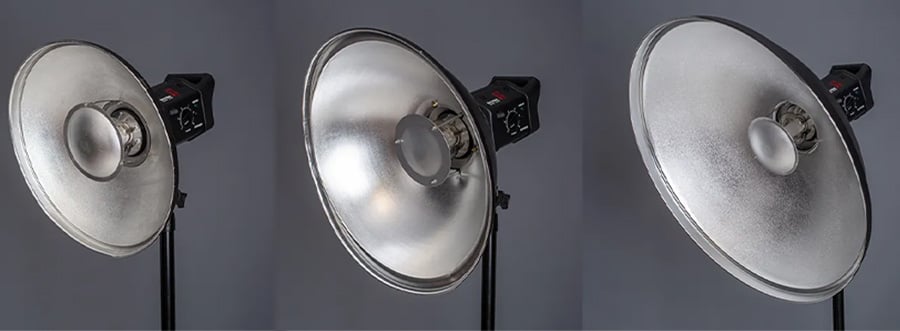
The other term you will hear mentioned is beauty dishes. As light modifiers, they are very effective when used in the right way. When it comes to purchasing prices, you will find that they are a good investment.
The shadows produced by beauty boxes have a rapid fall off. That means that they produce a soft light that is both sculpting and beautiful.
Just like softboxes, beauty dishes are available with a range of modifiers including socks, grids, and colors. One thing that makes them so versatile, is that they are available in different sizes.
Do they offer better value for money than softboxes? Surprisingly, they are often more expensive than lightboxes.
What Is Parabolic Lighting?
If you have been in the industry for a while, you may have heard of parabolic lighting.
It is one of the most versatile ways of working with light. Parabolic lighting gives off a sparkling light that helps to beautify an object.
Parabolic lighting comes with a range of options. You can attach a front diffuser which more or less turns them into a softbox.
The shape of a parabolic light is not suitable for all products and genres, its versatility means that you have many modifiers in one light source.
A softbox will certainly make your life easier as a product photographer. You will probably start out with one, but when you have spare cash available, you should consider investing in more.
There are many ways in which you can use softboxes. One of the best ways to make the most out of your softbox, is to use it when you photograph food. Getting the light right when you photograph food is important. The wrong light will make food look dull and unappetizing. That is not the sort of result that your client is going to be looking for.
Never be afraid to experiment with lighting modifiers for product photography. Maybe you will come across a new unique way to make use of light in your studio.
if you’re looking to increase your online conversion but still feel you are not sure where to start – check out these resources below:



24 thoughts on “Essential Lighting Modifiers for Product Photography (Full Guide)”
Mastering lighting is crucial in cosmetic photography, and this article hit the mark. It’s rich with practical advice, particularly on using softboxes for even, flattering light. This has changed how I shoot cosmetic products, bringing out the best in each item.
Navigating through lighting techniques can be daunting, but this piece on lighting modifiers simplified it all. It’s a treasure trove of information, especially for tech product reviews where precision lighting is key. The use of gobos for creating patterns and textures was a standout tip that’s already elevating my work.
Diving into this insightful piece on lighting modifiers opened new avenues for my photography blog. It’s not just informative but also inspires experimentation, like using color gels to create mood in product shots, which I’m excited to explore more.
Learning about Essential Lighting Modifiers has significantly upped my food photography game. Techniques like using bounce cards to eliminate shadows have been particularly effective in improving my photo quality.
Hello there, You’ve done an excellent job.
I’ll certainly digg it and personally recommend to my friends.
I am sure they will be benefited from this website.
For showcasing my jewelry designs, understanding lighting is key. This article on lighting modifiers was a perfect find, offering great tips like using spotlights to highlight intricate details, enhancing the allure of my pieces.
Delving into the world of lighting modifiers with this guide was enlightening. It’s packed with insights on achieving various effects in product photography, especially the creative applications of barn doors and honeycomb grids for my advertising work.
Your comprehensive guide on lighting modifiers for product photography has revolutionized how I take photos. Incredibly informative and easy to follow!
The tips are practical and effective!
This guide is outstanding. The detailed reviews and recommendations are exactly what I needed as a photography enthusiast. Great job!
Exploring Essential Lighting Modifiers for Product Photography has been transformative for my boutique’s product photography. It clearly illustrates how to use each modifier to boost product appeal, with the diffuser use for soft light being a game-changer.
I found the Essential Lighting Modifiers guide on Pro Photo Studio immensely useful for my food photography. The section on using bounce cards to eliminate unwanted shadows has already improved the quality of my photos.
As a jewelry designer, photography is crucial for showcasing my pieces. The article on lighting modifiers from Pro Photo Studio was just what I needed. The tips on using spotlights for highlighting details helped me capture the beauty of my designs.
The article on Essential Lighting Modifiers from Pro Photo Studio is both educational and inspiring. It provides a clear understanding of how to effectively use modifiers in product photography. The guide is a great learning tool for students like me.
As a small business owner, I found the lighting modifiers article extremely helpful. It demystifies professional photography techniques, making them accessible for someone with limited photography experience. The section on scrim use was a standout.
The lighting modifiers guide by Pro Photo Studio is top-notch. It offers a comprehensive look at tools essential for high-quality product photography. The practical applications for each type of modifier were especially useful.
Essential Lighting Modifiers article, and it’s a must-read for marketers. Understanding these tools can significantly elevate your product imagery, and this guide lays it out beautifully. The tips on using flags and cutters were particularly insightful.
The blog on lighting modifiers is a treasure trove of information. It covers everything from snoots to beauty dishes in detail. The advice on using modifiers to create specific moods and styles was invaluable.
Loved the guide on lighting modifiers from Pro Photo Studio. It’s a great read for anyone looking to up their product photography game. The explanations on how each modifier affects the final image were clear and concise.
The Essential Lighting Modifiers article on Pro Photo Studio is fantastic. It’s not just informative but also easy to understand, even for beginners. The comparison of umbrellas and softboxes offered practical insights I can immediately apply in my work.
Found the guide on Essential Lighting Modifiers incredibly useful for my online store. It breaks down complex lighting techniques into simple, actionable steps. The part about reflectors and their impact on product aesthetics was very helpful.
Pro Photo Studio’s article on lighting modifiers is a game-changer. It perfectly explains how to use each modifier to enhance product photos. The tips on balancing light with diffusers are a must-read for any commercial photographer.
What a great article. thanks so much for the info.
Just finished reading Essential Lighting Modifiers for Product Photography on Pro Photo Studio. It’s an invaluable resource, offering deep insights into the use of different modifiers. The section on softboxes and grids was particularly enlightening.