Our Guide To Mastering Focus Stacking For Macro Photography is not always about seeing the big picture. There are occasions when the smaller picture matters just as much. Is there a need for macro photography when you shoot products?
The answer to that question is absolutely. As a product photographer, there will be occasions when you will want to show the finer details. Watch photography and fine jewelry shots often benefit from macro photography.
On this page, we are going to take a look at focus stacking. It is a relatively new concept that has in many ways shed light on macro photography.
Let’s guide you through the process so that you can pick up your camera and have a go.
Focus Stacking: What Is It?

Take a look at the photographs on this page and you will notice a sharp focus right across the entire image. The effect is achieved by stacking a group of photos that are very similar.
We are going to teach you the tricks of the trade of focus stacking so that you can add it to your photographer’s website.
How can focus stacking help you as a photographer? As you may already have discovered, macro photography comes with a lot of challenges. The most common problems you will come across include reduction in sharpness, lack of depth of field, low light, and even softer diffraction.
Professionals use the technique to capture a variety of objects in focus on various planes. The end result is a sharp clear image and gives the final product fantastic depth without the loss of definition. The final image almost feels like you can reach out and touch it.
An Insight Into Stacking
If you like, there are two parts to the process. Let’s check them out.
Capturing an Image
The first thing you need to do is to learn how to capture an image. The trick here is to photograph the image using different focal points. In order to get a good image, you need to maintain a consistent adjustment on every shoot. The camera and the subject need to remain in the same position. That is easy to do when you are on a jewelry shoot, but if you like to capture wildlife, it is certainly a challenge.
Rendering Your Image
The next stage involves image rendering. This is where you need to bring your artistic side out. You also need to have patience when you do photo rendering.
A part of each picture is cut out and then pieced together. The final result should be a fully-focused image. You can decide on how many frames you would like to use. Play around with the images and find out what combination of different images work the best.
When Can I Use The Technique?

Once you have mastered the technique, you will find that it has lots of applications. We have already mentioned two of them, jewelry and watch photography. But, as a product photographer, you will also find the technique useful when photographing skincare and shooting eyewear.
When focus stacking is well done, you will end up with amazing shots. It is the kind of photo technique that really draws the person who sees the photograph in.
What Equipment Will I Need?
To the novice, the technique often seems daunting. It is easy to think that you will need special equipment to achieve a good quality stacked photo. The main ingredient you will need is patience. And you also need to give yourself time to practice. As photographers, we often just want to go ahead and snap the image.
Remember that photography is both a skill and an art form. As far as equipment goes, this is what you will need:
- DSLR or mirrorless camera
- Flash
- Tripod
- Photo editing bundle
If you want more information on the best DSLR cameras for product photographers, check out our page in recommended cameras for product photography.
Top Tips To Keep In Mind Before You Get Started
As this is a pretty unique way of creating photographs, there are a few things you need to bear in mind. Let’s run through them to get you started:
- As you will be shooting a lot of images, you should make sure that your camera’s battery is fully charged. If the battery has been in the camera for a while, make sure that you have a backup one handy. The technique is a bit of a battery killer.
- To make the entire process easier, it is best to use a self-time. Camera shake can seriously interfere with the end result.
- Dust is a major problem when it comes to any kind of macro photography. Make sure that your studio or photography environment is totally clean. You should also use the sensor cleaning function to help you to achieve the best photographs.
- Have a clear idea of what you like to achieve. It is almost like producing an image before you have created it. Photographers that like to sketch are often excellent macro photographers.
In a studio environment, you get the opportunity to set the scene. - When you work outside setting the scene and controlling light and dust is more challenging. Keep that in mind if you are shooting outside.
Available Options For Stacking Photos
There are different ways to achieve amazing results and we are going to run through them with you.
Manually Shifting Focus
One of the methods that work well is shifting focus manually in full- zoom mode. It is an excellent way to get started as you don’t need any special equipment. All that you really need is a tripod and camera. Okay, you are going to spend time cropping the image as the lens changes focal length when you shift the focus. This does depend on what lens you have.
What Is A Helicon Tube?
Using a Helicon tube only works for lenses that are electronically controlled. However, it is a fantastic method. There are lots of different photography kits that are also useful.
A Helion Tube is an extension tube that allows your camera to perform fully automated. It is a bit like an autopilot on an aircraft. You set it up and you are good to go. It is one of the best options and the results are fantastic.
Have You heard Of Automated Focus Railing?

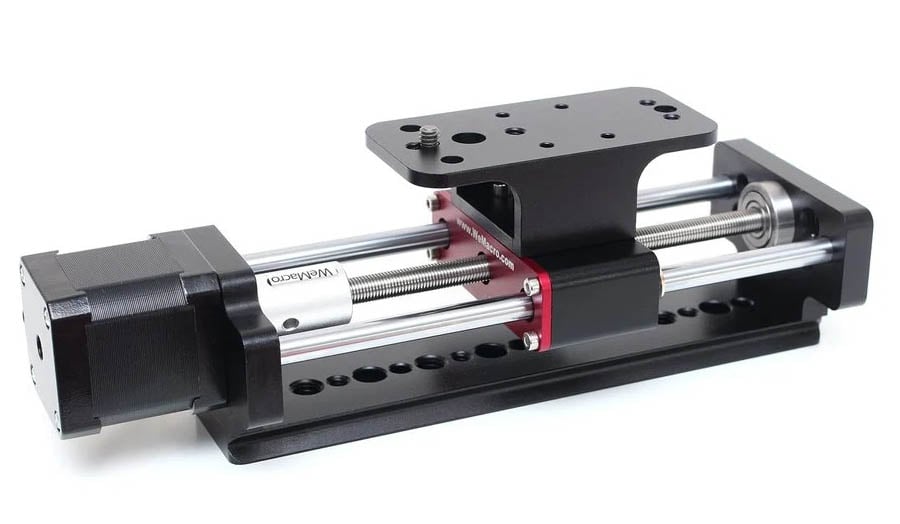
This is another technical term you need to familiarize yourself with as a photographer. Automated focusing railing is a great method when you want to achieve perfectly stacked images. As every step is electronic managed the image quality is second to none. What you need to invest in is a good macro slider.
The Perfect Camera For The Job
Of course, we can all dream of having the perfect camera for the job. Most Newest DSLR’s cameras have stacking software and you will also find a stacking feature built in Canon cameras that use the Magic Lantern firmware. It gives you the right precision that you are looking for as a professional photographer.
An In-depth Insight Into Stacking For Macro Photography
Stacking focus is part of the post-photography process. That being said, it all starts when you are still snapping photos. As with everything else in photography, if you don’t capture good images first of all, stacking will be a much lengthier process.
Adjusting Your Camera and Equipment
Arm yourself with patience and start adjusting your equipment. Start shooting consecutive shots frame by frame. Make sure that you have a sturdy tripod to avoid any kind of movement or camera shake. It is also a good idea to turn the self-timer your camera on.
Set up your shoot and start shooting in manual mode. Shooting in manual mode is the best way to shoot high-quality images that are easy to compile and work with later. The more effort you put in at that stage, the easier it will make working with the images later.
If you have a camera with an in-built stacking function, you should work with manual focus.
Shifting the focus is a rather tedious task. A camera with a built-in function is great. But, if you don’t have one right now, you can always add a new one to your range of cameras later.
Time To Start Shooting
Once everything is set up, you can start shooting consecutive shots. The way you work is up to you.
You can either work your way from the front to back or the other way around. In a perfect world, you want to adjust before you snap the next image. How many photographs you take is up to you. Some photographers like to take a small number of shots while others end up working with up to 50 shots.
If you are doing a product shoot, make sure you keep an eye on the time. After all, this is a business and you don’t want to end up with too much work without getting paid for your efforts.
When you have gained experience working with the technique, you will realize that the final number of images depends on two factors:
- The shallowness of depth of field
- The precision of the outcome
Choose The Right Editing Software
This is perhaps the most important part of the entire process. There are numerous software programs that you can check out. They include Helicon Focus, Combine ZP, and Zerene Stacker.
But, without a shadow of a doubt, the best one is Adobe Photoshop. If you would like to know more about photo editing, we have covered the topic.
Start Editing
The first thing you need to do is to sort out the images that you would like to use. When you use Lightroom, all of the raw snaps are going to be part of the final image. Choose your images and make sure that all your editing parameters are right. If they are not, going to end with a final image that is less than perfect. The more work you do at this stage of the process, the easier your job will be later on.
Layering Raw Images
This is one of the most enjoyable steps of the entire process. In the function Open Layers, all you have to do is to drag in all of the images. They will form a single document. Without that single document, you are not going to be able to move on to the next stage.
Time To Align and Blend The Images
The more difficult and challenging part is now completed. It is time for you to move on to alignment. This option lets you align the images into a perfectly matched sequence.
The next job is to blend the images. When you have Adobe, you can take advantage of using the Blend Layers’ Tool. It is a really useful option that lets you select tine, color, and lots of other features that will form part of the final image.
Editing And Producing The Final Image
You are now one step closer to the final product. The software now lets you crop the image, adjust the parameters and you can also give the image that final touch-up. You can also export the image but don’t forget to save a copy.
That is it, you are done and ready to go. You have completed your first focus stacking process.
In Conclusion
It certainly takes a lot of effort and that is why many product photographers don’t like working with the profess. However, it certainly adds another string to your bow.
Why not add it to your skillset and a great way to make your product photography stand out. Feel free to carry on reading our useful tips including our guide to still life photography. Our site is packed with handy tips for product photographers.
if you’re looking to increase your online conversion but still feel you are not sure where to start – check out these resources below:


