How to Perfectly Photograph Shiny Metal Objects: A Guide to Product Photography
In this guide, we’ll explore the basics of how to photograph shiny metal objects, including tips and techniques for product photography with a focus on achieving high-quality results without blown-out spots.
Product photography is a critical aspect of advertising and marketing, particularly in the age of digital commerce. With the increasing reliance on e-commerce platforms and social media, high-quality product photos can make all the difference in terms of attracting and retaining customers. However, photographing shiny metal objects presents unique challenges.
The reflective surfaces of metal objects can cause blown-out spots, resulting in a loss of texture and detail in product photos.

The Fundamentals of Metal Photography
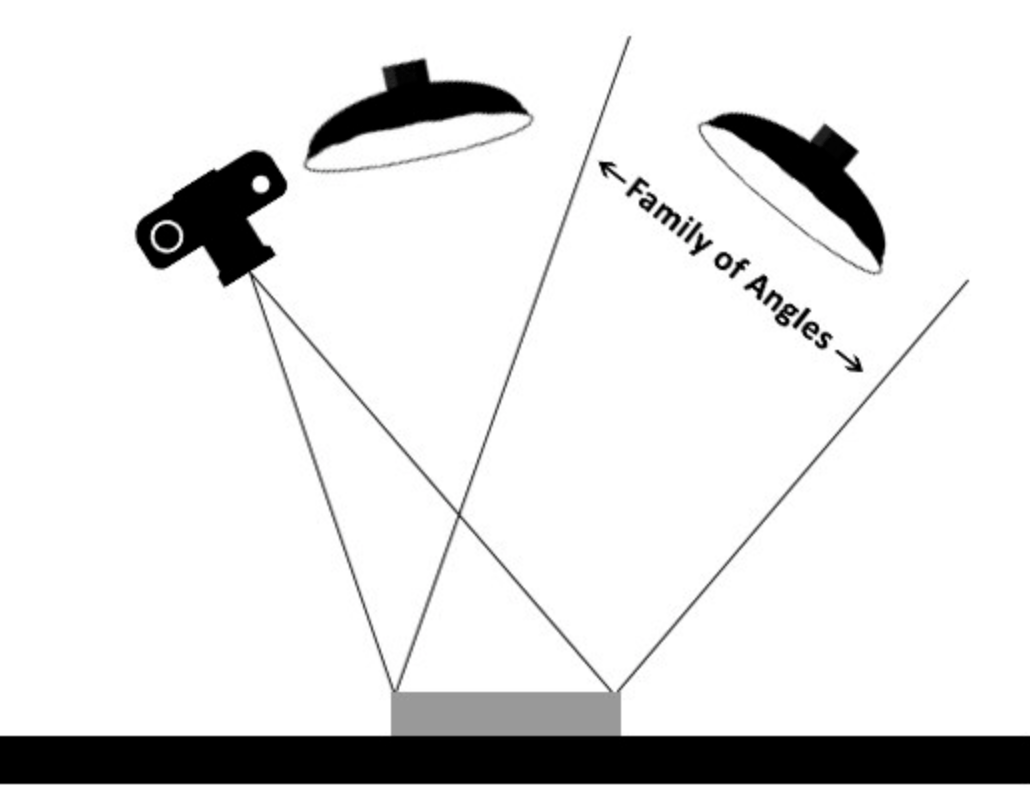
When it comes to photographing shiny metal objects, understanding the basics is key. The law of reflection, which states that the angle of incidence of light is equal to the angle of reflection, is essential to consider. Metal objects have highly reflective surfaces, which can cause problems when you photograph them directly with a flash.
The light emitted by the flash vs LED will reflect off the surface of the object, resulting in specular highlights and over exposed, making it difficult to capture the texture and background of the object.
How to Photograph Shiny Metal Objects
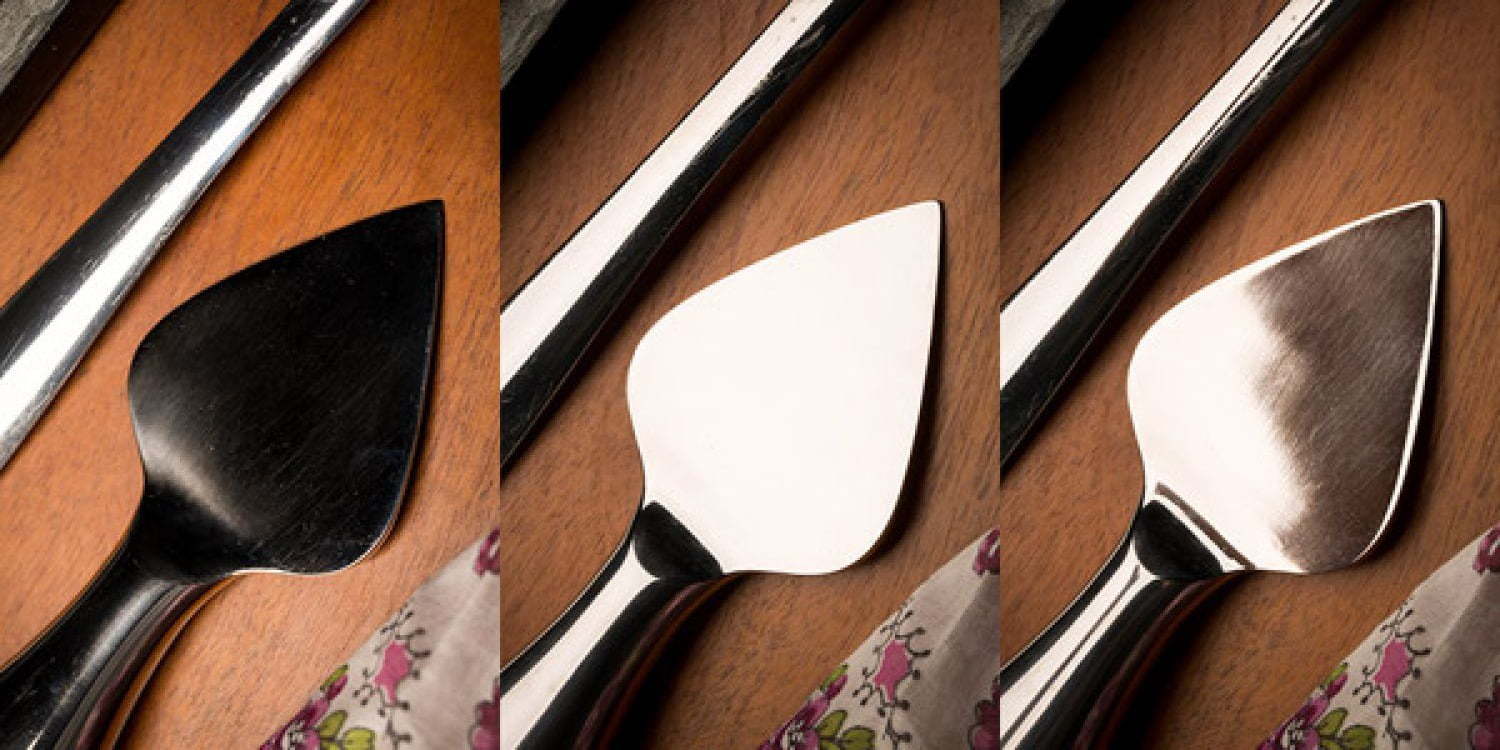
To overcome this problem, the angle of the light source must be changed, and the object should be captured from a different perspective. The light source should be larger than the flash’s light, and you should position it behind the object at the same angle as the camera.
This way, the light reflected by the object will be larger than the light emitted by the flash, allowing you to capture the texture and details without blown-out spots.
The Simple Technique for Metal Photography
One of the best ways to capture professional photos of shiny metal objects is by using a simple yet effective technique. You don’t need expensive equipment or a photographic studio to achieve professional results. All you need is a flash, a trigger system to fire it off-camera, and a white cardboard background.
One of the basics of Metal Photography: the Law of Reflection
Before entering the subject we will explain one of the fundamental aspects of Metal Photography. For that we will get a little theoretical, bringing up an old Physics law. Do not worry because it’s implementation will be quite simple, as you’ll see while reading this article.
equality between the angle of incidence and the angle of reflection.
How to photograph shiny metal objects the proper way?
So, what should be done to avoid this?
Conclusion
FAQs
The law of reflection states that the angle of incidence of light is equal to the angle of reflection. This law is important in metal photography because metal objects have highly reflective surfaces, which can cause blown-out spots and specular highlights when photographed directly with a flash.
No, you don’t need expensive equipment to achieve professional results. All you need is a flash, a trigger system to fire it off-camera, and a white cardboard background.
To avoid blown-out spots, you should change the angle of the light source and capture the object from a different perspective. The light source should be larger than the flash’s light, and you should position it behind the object at the same angle as the camera.
Some additional tips to perfect your metal photography include using a tripod to keep the camera steady, experimenting with different angles between the flash, cardboard, and object, using a remote trigger for more stability and control, and adding additional light sources to create more complex lighting setups and highlights.
if you’re looking to increase your online conversion but still feel you are not sure where to start – check out these resources below:


5 thoughts on “How to photograph shiny metal objects. -Low of reflection (Updated 2023)”
OMG! I hate shiny objects. That article actually helped with the lighting, so thanks.
I never realized how important the angle of the lights is in product photography. I’ll definitely be more mindful of that in the future.
In this article the images are not loading..
Impressive article. Really in details on how to photograph shiny metal objects.
Hard to photograph shiny metal objects, that helped.