
Did you know that optimizing images in WordPress makes your site better positioned in searches? For your site to have a better ranking, the content must be optimized for SEO, as well as photos. Good images are mandatory for any successful website. They serve to attract and keep the attention of visitors.
Unlike the social networks that take care of optimizing the images automatically, you need to follow some important steps to optimize images for your blog or website. In this post, we will explain to you how you can optimize images for a website and achieve greater relevance in searches.
But first, what is image optimization?
Image optimization is the process that aims to deliver high-quality graphic representations both in format, dimension, size, and resolution. All this influences the performance of your website, in addition to being one of the ranking factors.
Why optimize images for a website?
It is common knowledge among web developers that one of the main causes of slowness in websites is the inappropriate use of images. Even if you are running the website on the best servers, with optimized infrastructure and caching system, images used in the wrong way will make your site slower.
There are also business reasons. For example, if you don’t have a server with unlimited storage and transfer, the more optimized your images are, the better it will be for your hosting plan. In general terms, you should take image optimization seriously because:
• Improves the experience of those who use your website
- Improves the chances of the site being in better positions on Google
- Decreases the number of site abandonments (which happen because the page took too long to load)
- Increases the number of website pages viewed in each session
- Drive conversions
- Improves your chances of standing out from competing projects etc.
Importance of optimizing images for websites
An excellent reason why you should pay attention to optimizing images is to provide lighter and better performing sites to your visitors, which directly affects usage and browsing experiences.
Several studies have shown that the ideal loading time of mobile sites should be a maximum of 3 seconds (some studies indicate up to 2 seconds). More than half of visitors (53%) leave the site if the loading takes longer than that.
A slow site will have a high bounce rate. And likely, these are visitors who will never return to such a site (which proved to be slow) in the future. Another good reason why you should care about optimizing images is that it directly affects the position of your sites in search engines.
In SEO, content is still the most important, but optimization of web images is also a factor taken into account by Google (and possibly other search engines), which can be the difference between you appearing in a better position or not.
So now you know, among many other reasons, image optimization for your website brings great benefits related to:
- Performance: Ensuring that the site loads as quickly and easily as possible is essential to the overall performance of the site.
- User Experience: Optimized images are also more useful and relevant images for visitors.
Less work for the server
The server is where you have your website hosted. In other words, the server is what allows the user to see all the pages, texts, colors, images, and so on. If you optimize the images, your server will have a better performance in general. You will also save storage space.
With this, it is clear that optimizing the image for your website is very important, as it brings several benefits to your website. If you don’t know or have mastered editing programs to optimize your image, don’t worry. Follow this checklist and learn how to optimize images for the Web quickly and easily.
Steps to optimize images for a website
Step 1: Determine the loading speed of your website.
The first thing you should check before optimizing your image is the speed of your website. This is one of the factors that interfere in the positioning of the page in the search engines. Therefore, it is necessary to closely monitor all variables that can change this value, such as the size of the images.
Several tools can help you test your website’s speed, such as Google PageSpeed Insights, GTMetrix, PageScoring, WebPage Test, among others. With these tools, you will be able to obtain a complete report with the time spent and the main problems encountered. These results of the speed analysis will give you a great benchmark, so you know where you’re starting at.
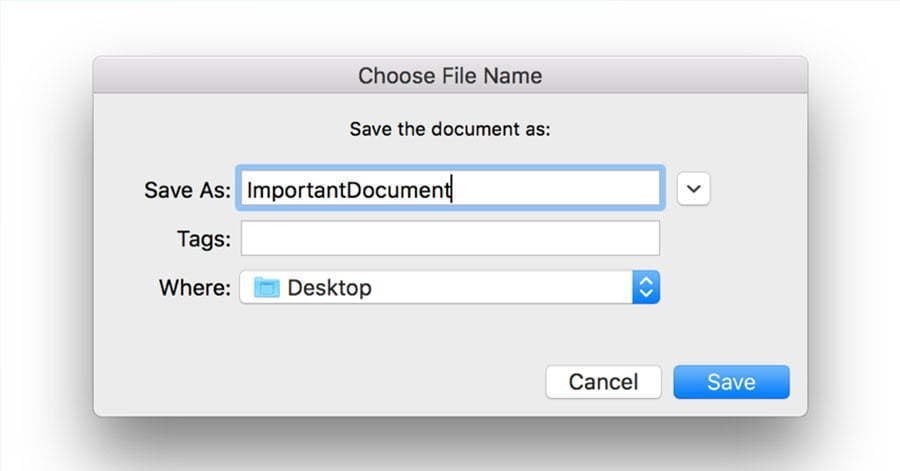
Step 2: Optimize the image file name
Never upload an image to the Web with the original file name. Usually, files generated by cameras, scanners, cell phones, and even those acquired from an image bank are named with some type/code pattern, e.g., img12042017.jpg, icon041220171955.png, etc.
Note that Google doesn’t know how to see an image, but it knows how to read an image. A good tip at this point is to use the keyword of your content as the name of the image. In addition to strengthening SEO, it facilitates the organization and production of content.
Step 3: Choose the best image format.
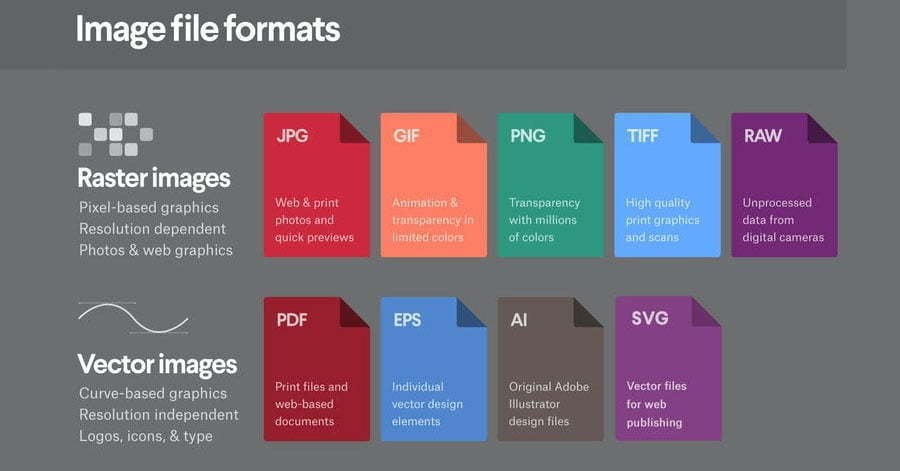
There are different image formats that you can use on your website. Depending on the format you use (JPEGs, PNG, GIFs), you can have images with a larger file, better quality, among other aspects.
The formats mentioned above are the most common to be used. But what differentiates them? Roughly speaking, each format has differences in compression size, with or without loss of quality. Let’s understand them better below.
i. JPEGs format: JPEG is the format indicated for being the format that supports millions of colors (and yet with an excellent compression rate), balancing weight and image quality well. It is an ideal format if you’re going to use an image that was taken from a camera or smartphone.
ii. PNG format: it is used for images made with geometric shapes and have flat colors. The great advantage of this format is that it preserves transparency and does not lose much quality when compressing the image.
iii. Gif format: Due to the evolution of other formats and possibilities on the Web, the GIF format is quickly falling out of use. Mostly, this format is used for animations. And because they are videos without the proper characteristics, they are usually very heavy and unsuitable for the digital environment.
Therefore, compared to other formats, there are practically no advantages and/or justifications for using GIF in web projects.
Step 4: Resize your image
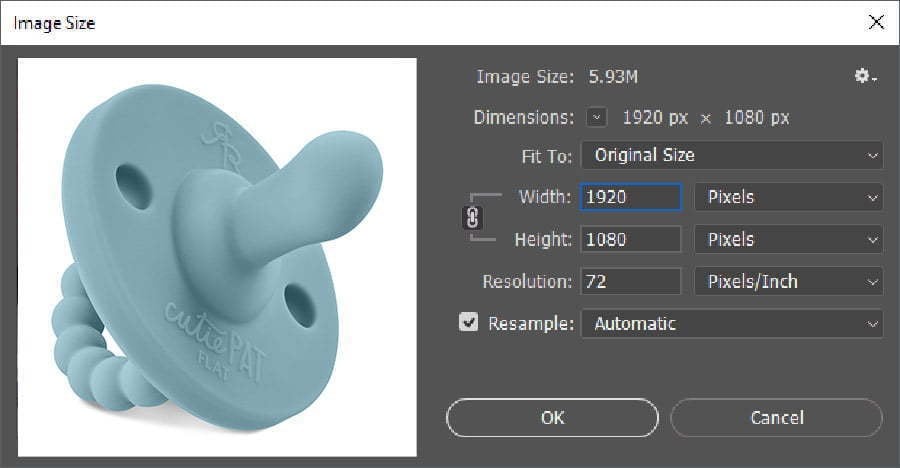
In the same way that you should not use low-quality images (resolution), you should not use images with a resolution higher than necessary. This is very important as it is directly linked to the “weight” of the image file.
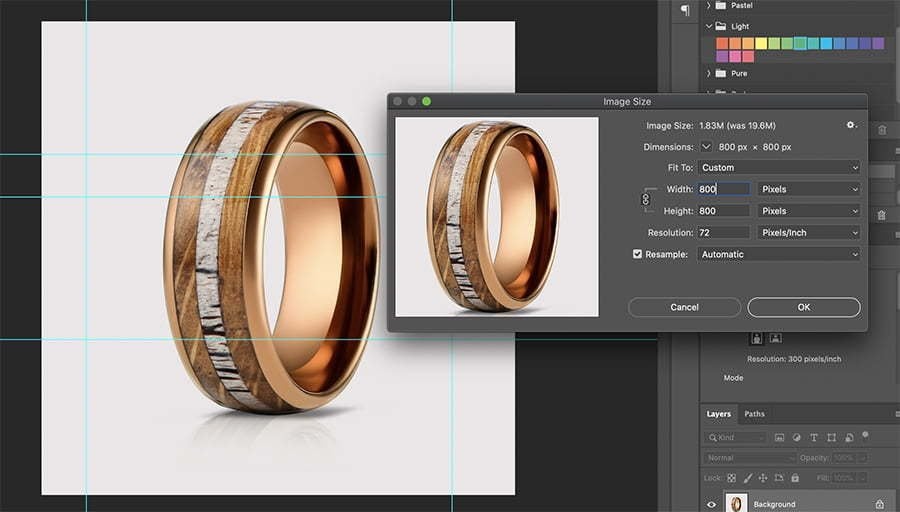
For a good performance of your website, it is important to resize the images before uploading. This is because images with a very large size can impact the loading of the pages and offer a bad user experience. What you should keep in mind when resizing the image is that the more pixels it has, the better its resolution. But, if it is too big, it will slow loading.
To apply this adjustment, you can use the famous image editing programs (Adobe Photoshop, Illustrator, etc.) to apply a crop or just readjust the resolution to the ideal size.
And what is the ideal size? The ideal resolution for an image is the relationship between quality (resolution) x size (bytes). If you are not sure what size or resolution to use, the ideal is 2048 pixels wide, with 240 DPI.
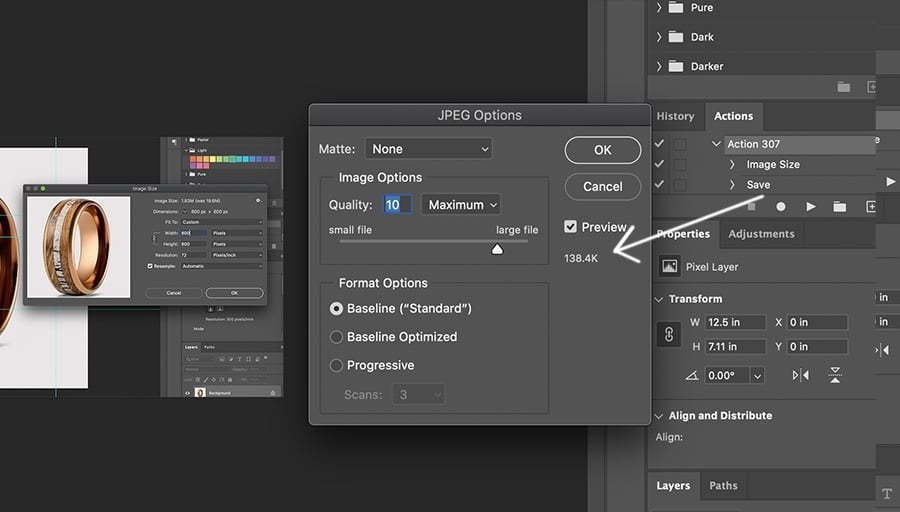
Step 5: Compression image to reduce the size
Just reducing the image size is not enough to optimize the image for the Web. It is necessary to compress it. There are several programs you can use to compress your images before uploading.
But, so that your photos do not have a bad resolution, it is necessary to find an ideal size between the quality of the compression and the final size. This is because if you compress it too much, it will have a good quality image, but your file will be bigger and heavier to load the page. With higher compression, the image quality drops a little, but the size will be smaller.
Some of the tools that can help you compress your image are:
i. JPEGmini: software that reduces up to 80% of the file size of your photos while maintaining quality.
ii. TinyPNG: TinyPNG is an online platform that can be used free of charge for images up to 5MB in size. It is very simple to use. Just insert the JPG or PNG file on the main page, and it will compress your image without losing quality.
iii. ImageOptim: a free program that offers the option to reduce the size of images, supports PNG, JPEG, and GIF formats.
Step 6: Optimize images using WordPress plugins
Having an image optimization plugin allows you not to worry about this issue once the image is in your WordPress. They usually work automatically, and there are multiple offers of free and paid plugins. Some of the popular plugins you can use are:
i. WP Smush it
WP Smush.it is perhaps the best known and most used plugin. It automatically optimizes each uploaded image and also allows you to optimize previously uploaded images easily. It allows optimizing up to 50 images at the same time, either in lazy load, changing their size, or compressing them to improve traffic and web positioning.
ii. Imagify
For sites with lots of images, it may be worth investing in a paid plugin like Imagify. Its main advantage is that it allows you to optimize all the images on a website with a single click, choosing between different compression levels, adapting them for better viewing on mobile devices, and saving a lot of time. In addition, it has the added value of keeping the original images in case you want to revert any of the changes made.
This is also an excellent plugin to automatically optimize images as they are uploaded to your website without loss. In addition, if you already have images in your library, you can use this plugin to optimize them. A good feature of EWWW is its ability to convert images to more optimized formats, in addition to reductions. It is a free plugin listed in the official directory, but you can pay for the service if you want to use their servers for optimization.
iv. Compress JPEG & PNG Images
Created by TinyPNG, the Compress JPEG and PNG automatically optimizes JPEG and PNG images as you upload them. In addition, the plugin offers encoding for progressive JPEGs and is excellent for compressing animated PNGs. There are no limitations on image sizes, but if you need to optimize more than 100 images per month, you will need to purchase a plan.
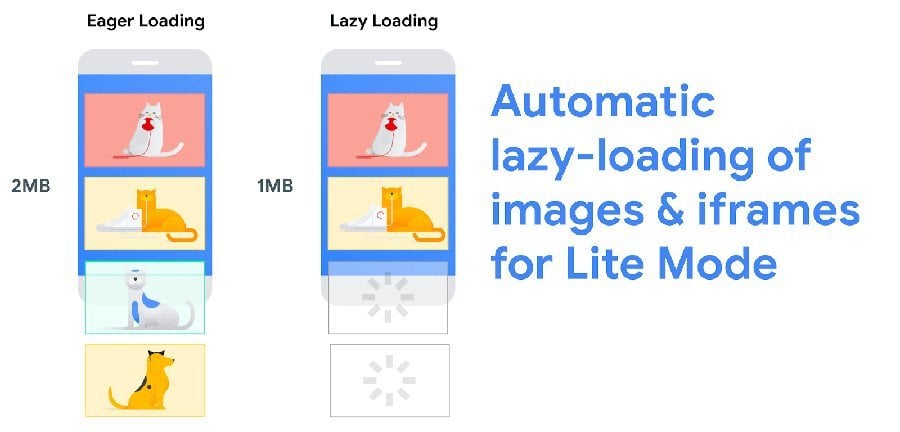
Step 7: Use lazy load strategy
Lazy loading is the strategy of loading images as needed, and not in advance. What the plugin does is load the images as they appear on the screen, not all at the same time. What sense would it make to upload an image at the end of the post if the person only reads it halfway?
This way, the page will load faster because, instead of loading all the images present on a page at the time of access, each image only loads when it is on screen.
Conclusion
For most people, the simple term “image optimization” evokes self-evident benefits. In the case of images for the Web, it couldn’t be different. Moreover, it is necessary to pay special attention to this type of optimization, given that bad images used in the online environment is one of the main causes of poor performance in web projects.
Lastly, remember that optimizing images for a website is not as simple as it sounds, and not all techniques (generally) can be used at the same time. Do the best you can, and you will reap the benefits of image optimization.






1 thought on “How to optimize your images for a website”
Great photography knowledge right here